Jump to:
Winter can be a difficult time for many birds; short supply is short, and nesting options are limited. They need somewhere warm and safe to conserve energy and survive the weather. One great way to support starlings is by providing nest boxes. Here’s how you can help!
Nest Boxes for Birds

Putting out bird food in the feeders is one thing, and birds love them! But without access to warm shelters, they won’t have a place to raise the next generation. That’s where nesting sites come in.
Nest boxes, or birdhouses, are small enclosure structures that give birds a safe place to nest, roost, and shelter. They are designed to mimic natural hallows, where these featured creatures can raise their young.
Birds will nest as early as the weather allows before the migrants arrive. The ideal months for getting the active nest boxes are around February to March. Migratory birds begin to show up by the end of March, though some won’t arrive until late May. So, you have plenty of time to set up those nest boxes for the latecomers in early spring.
Once you’ve set up those birdhouses, you’ll enjoy hours of watching the birds come and go! But first, you need to build one.
How to Create Nest Boxes
You can set up your birdhouse anytime, but early spring is ideal since nesting season can start as early as mid-March. Check out the DIY step-by-step guide below, along with a few things to keep in mind to get started:
(Image Credit: Wikimedia Commons)
Step 1: Pick a good spot
We all want to live in a nice neighbourhood, and birds are no different! Just like with bird feeders, you need to place the nesting box where predators like cats and squirrels can’t reach them.
It’s great to see the boxes from your window, but not at the cost of the birds’ safety. You might consider placing them under the eaves of your house or on a mature tree. Ideally, they should be at least 3 metres (10 feet) off the ground, facing north or east to avoid direct sunlight. Also, avoid putting them over doorways, windows, or high-traffic paths.
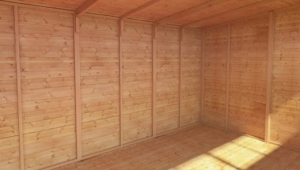
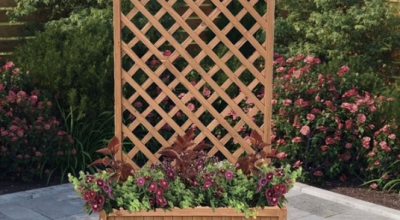
One option is to attach a next box to the edge of a wooden gazebo or pergola.
Step 2: Select your wood
Choosing the right wood for a bird box is important. Cedar is your best bet because it holds up well against the elements and doesn’t rot as quickly as pine or other softwoods. If you can’t find cedar, pressure-treated lumber will work, too, but steer clear of using treated wood near food sources, like fruit trees.
The thickness of the wood matters as well—it helps insulate the box from the cold and heat and prevents it from warping over time. Oak and beech are great options since they’re more durable and of exterior quality.
Step 3: Measure and cut
Mark and cut your chosen wood, depending on your nest box design. Drill some holes in the bottom for drainage using a reliable drill bit. Then, make a 4.5cm round hole for the bird’s entry point.
Step 4: Drill air holes
Next, use a wood drill bit smaller than two inches in diameter for ventilation on the opposite side. Make sure these holes are high enough not to dip into water when it rains.
Step 5: Put the box together
Now that you have all the pieces cut out, it’s time to assemble them with nails. Nails are a better choice for outdoor projects because they don’t rust over time like screws do.
Nail all the pieces together, connecting the sides to the back and front, and then “wrap around” the base; just leave the roof off for now. If sawdust ends up blocking the ventilation holes during assembly, feel free to use screws instead to prevent any buildup.
Step 6: Attach the roof
For this step, use screws so you can access the box later for cleaning. Attach a waterproof strip, like green mineral felt, along the top edge to create a hinge. Then, drill guide holes at the top and bottom of the box’s backing plate. This is where you’ll screw the box into its final spot.
Step 7: Hang your bird nest box
(Image Credit: Geograph Ireland)
Finally, attach your box to something sturdy that won’t move, like a tree trunk, branch, or wall. If you’re mounting it to a wall, use screws and wall plugs. If you’re placing it in a tree, try using adjustable ties, like thick fencing wire threaded through a piece of hosepipe. This way, as the tree grows, you can easily adjust the wire.
Once the box is up, keep an eye out to see if any local birds have moved in. Look for a pair coming to claim their new home in the spring!
Round-up
We all need a safe place to live, and wildlife, like nesting birds, is no different. No matter the size of your outdoor space, this is an easy way to support nature right at your doorstep. So, remember to lend a helping hand whenever you can—nest boxes will be appreciated. You might even build an outdoor bird aviary in the future if you decide to take care of aviary birds!


What do you think ?