
Jump to:
Running out of space in your shed? There’s a way to extend it. It’s a large carpentry job, but you can add length with extra panels and floorboards.
This how-to guide applies to modular sheds built from panels. Keep in mind that this is a modification that may void the original warranty. If that’s alright with you, let’s get started.
How to Make a Shed Bigger
For your wooden shed extension project, the original manufacturer of your shed might be able to provide you with extra parts that match the same specification, to keep the building uniform. You’ll want the exact same dimensions of parts for the floor, walls and roof.
Any extension has to consider the orientation of the roof. To avoid having to substantially redesign and rebuild the whole shed, the extension has to be able to leave the original roof largely in place, with the same angle of slope. To achieve this, we are extending the length from gable to gable. So for instance, on a traditional apex shed where the front wall is under the A-shaped roof gable, you would be extending the depth of the shed (front to back) rather than the width from left to right.
Check the base
The base has to be long enough to match the extra panels you plan to add. If the base is too short, build more onto it.
Measure the length and width, and use a spirit level to ensure the surface is flat before adding the new floor section.
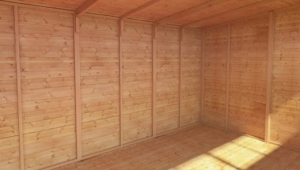
Remove the end wall and gable
For modular wooden sheds, the end wall and gable can be removed to extend the building. Take off the panel at the end of the shed, along with the gable section at the top of the wall.
It should be straightforward, almost the same as installing it, just in reverse. Keep the removed screws and fittings in a container for later use. You may be able to reattach the same parts to replace the end wall later.
This step gives you room for the extension and makes it easier to line up the new panels.
Add floor bearers and floorboards
Keep the bearers at the same spacing as the existing ones to avoid sagging. Then lay the new floorboards or floor panels along the extension, line them up with the old boards, and screw them down.
Give the floor a quick check with a spirit level. Move any bearers that aren’t sitting right so the whole floor feels solid before you start adding the walls.
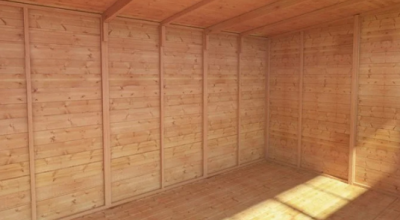
Add wall panels
Fit the new wall panels on the rail at the edge of the new floor section, and line it up with the existing walls. Tighten the joints using the screws or fixings you saved earlier. Walk around the shed and press on the walls. You want them to feel steady before you start adding the roof. Use a spirit level to ensure everything is perfectly upright.
Reattach the end wall and gable
Measure the end corners diagonally. To have the shed perfectly square and level, each diagonal should have the same measurements. If not, you may need to adjust the tightness of fastenings. Once everything is straight, replace the end wall panel. The corners must meet, and the panels should sit flush.
Extend the roof
Your shed might use tongue and groove boards, or OSB panels for the roof. Whichever you are using, now is the time to fit the extra roof section. Depending on how long your extension is, you may have extra roof purlins to add for roof support, as well as extending a central beam along the length of an apex roof.
Once the roof material has been installed onto its supports and attached to the walls, it’s time to refit the gable and any extended fascia boards. Then you can fit your roof felt or shingles – remember to consider the flow of rainwater and have an overlap where needed.
Check all the screws and fixings are tight. Give the wall and roof a little shake to see that everything feels steady and sits flush before you call it done.
Do final checks
Open and close the doors and windows. If anything sticks or feels off, make adjustments before finishing. Do the same thing around the walls by pressing the walls and stepping on the floor—both must feel solid and even.
Finally, check the roof and corners for gaps where water could get in. Fit felt, flashing, or other touch-ups to seal the shed and keep it dry.
Paint to match
Even if you never painted your original shed, the new wood might have a slightly different colour to it, being less aged. Assuming you don’t want your new extension to look mismatched, that means you have the fun task of giving the whole shed a new paint job! Just remember that if your parts are pressure treated, they need to be given 4-6 months for the treatment to dry before painting.
Round-up
The extension comes together when the base is strong and the panels line up. Look over the walls, roof, and corners, and tighten or adjust any loose panels or gaps. Voila – your shed is now longer and ready for more!
Working on an inclined garden? Get more tips here: How to Build a Shed Base on a Slope


What do you think ?