Jump to:
Sure, we all clean your home regularly. But even garden spring cleaning and maintenance is maybe a once-a-year routine. How often do you really check on your shed’s condition? Is it regularly, yearly, or only once in a blue moon?
The main purpose of shed maintenance is to ensure that you get the most life out of your garden building. This includes taking care of everything inside your shed took, be it tools or bikes.
So, if you want it to stay on top of shed maintenance and cleaning tips, we’ve got you covered.
Check out our ultimate, curated checklist below!

1. Check for leaks and breaks
Leaks and breaks often go unnoticed. When inspecting your shed, make sure to check every nook and cranny of the building. You might be surprised by how many hidden issues your shed has. But you’ll sure be happy when you finally figure out what needs fixing.
And most shed owners know that this step is one of the most important when maintaining your shed. By carrying out a proper walkthrough of your shed, you can start to tackle problems before they get out of hand.
A great example of this is spotting signs of damp. Areas with discolouration, excess moistness, and even wet tools might indicate that your shed is leaking.
Another one is checking your outbuilding for damage. Are there any signs of cracked timber or damaged areas? If so, repairs are a must.
Find the source of the leak. Check for puddles near walls or on the ceiling, and mend any seriously damaged parts of your shed.
Otherwise, step two on our maintenance list won’t be effective.
2. Waterproof
Timber buildings are prone to waterlogging. When water keeps getting in, your wooden shed can rot. Even worse, maintenance might not be enough to salvage the building if damage has already built up over time.
Prolonged water damage is something you want to avoid at all costs. That’s why following steps to waterproof your shed is crucial.
But the waterproofing process requires your time and effort. So, to help you with task number two, be sure to add these sub-steps into your maintenance checklist.
Start off with the base, then move on to windows and doors, and up to the roof and gutters last.
3. Check the base
Examine if your shed makes direct contact with the ground. If yes, the structure is likely to be vulnerable to dampness, let alone insect infestation. What you can do is make sure your outbuilding sits on the right base.
There are a few reasons for this:
- Limiting the impact of rainwater and puddling
- Removing your shed from moisture-rich ground
- Allowing for ventilation and proper drainage
- Warding off both dampness and insect invasion
4. Inspect your windows and doors
Over time, timber shrinks, causing cracks that can appear in the window and door frames of your shed. Be sure to fill any cracks or gaps you may find to keep your wooden structure watertight.
You can use expanding foam to fill in gaps for windows, whilst excluder tape is great at sealing doors.
5. Examine the condition of your roof
If there’s one part of your shed that takes the most punishment from the elements, it’s the roof. If you want your shed to stay in good condition from top to bottom, extra roof care is essential.
Over time, felt shingles will naturally become prone to deterioration. If your shed is covered in this type of roofing material, try to minimise wear and tear. You also need to pay attention to the edge and ridge line of the roof.
But adding shingles or other roofing material can add an extra layer of roof protection. This is also great for making sure the timber beneath doesn’t get wet when heavy rain or snow comes.
As for any worn-out felt, simply switch it for a waterproof shed membrane, fresh felt, or EPDM rubber sheeting.

6. Clean the gutters
Part of your roof inspection includes the gutters. As you aim for a watertight garden shed, you’ll want to make sure the drainage is clear of debris like mud and leaves.
Neglected gutters can form large pools of water. This could potentially lead to gutter damage and minor flooding.
Now, what about if your shed doesn’t have gutters? Your best bet is to install some. This will prevent any drainage issues in the long run and direct your runoff away from your shed’s base.
Check out this gutter system for your drainage solution.
7. Get rid of pests
Remember, the warm weather doesn’t just encourage us to all come out of the woodwork. It also brings out bugs, rodents, and other pests to potentially wreak havoc on your shed.
Getting rid of them may not be as easy as you might think. But knowing that your shed is pest-free is certainly worth it.
Not only can pests add to shed deterioration, but they can also further harm your belongings.
Here’s a list of the common pests you need to look out for:
- Rats, mice, and other rodents
- Mosquitoes, flies, spiders
- Bees, wasps, and yellow jackets
- Snakes (dependent on where you live)
And if you want to know how to prevent all of them – here’s how you can bug-proof your shed:
- Inspect your shed for any open cracks and crevices, as mice can get through small openings. Fill them with wire mesh and sheet metal to prevent rodents from entering.
- Trim all grass around the perimeter. Keep nearby vegetation and low-hanging branches that offer food and shelter to bugs away.
- Store firewood away from your shed since pests can hide there. The same goes for rock piles and other debris.
- Don’t store rubbish inside your garden building. This attracts bugs and even, sometimes, squirrels.
- Store bird seed, pet foods, and fertilisers in containers and tightly sealed bags.
- Regularly cleaning, sweeping, or vacuuming your shed once a quarter creates a clean environment that bugs hate.
- Prevent standing water from pooling inside or near your shed. Most bugs, especially mosquitoes, are attracted to puddles of water. Not only that but excess moisture can lead to rot and decay in wood.
8. Stop the mould
Experiencing damp conditions in your home is nothing new. And your shed is no exception, particularly during the colder months. But with dampness comes mould.
Leaving your shed door open (as much as possible) is a great way to invite the air in to circulate. This is an effective way to stop mould from growing and spreading.
Ventilating your building also can help stop moisture from building up. Simple tasks like these will help keep moisture levels down.
Without dampness, there’ll be no mould.
9. Insulate and ventilate
A well-insulated shed is less susceptible to external climate changes.
Lowering inside humidity can also help to keep your stored items dry and safe. This results in a longer life both for your belongings and the shed itself!
So if you want to reduce maintenance costs, consider insulating your outdoor garden building if you haven’t already done so.
Plus, during the winter months, humidity begins to condense in the air. Ventilating your shed is another excellent way to keep heat trapped whilst saving your tools and equipment from damage.
So make sure to ventilate your shed. Otherwise, you might end up defeating the whole purpose of waterproofing your outbuilding in the first place!
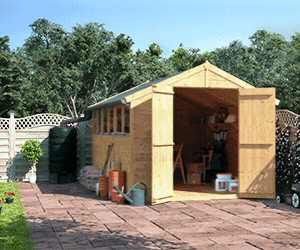
10. Store your tools and equipment properly
Your shed can accumulate tons of clutter over the year. (I know mine has!). Take this time of the year to sort out your gardening tools and outdoor equipment.
Toss any broken or unwanted items to give you space back for the things you want to add. You can either sell items, donate them, or throw them away.
If you store some gardening supplies, such as soil and mulch, we advise you to store them in waterproof bags or containers to prevent mould growth. As for your lawn mower and other bulky items, make sure to empty gasoline before tucking them away throughout the winter.
Use excess tarps to cover your tools and equipment. This is to prevent any dust from settling, so you don’t have to clean your tools and equipment again next spring.
11. Take inventory of your tools
You might as well grab this chance to take stock of your tools and equipment. Check if everything is working properly. Does anything need refuelling, an oil change, or a battery replacing?
Identify what needs to be fixed and to be replaced. This is also a great time to see if you’ve got every tool you need in your shed, including:
- Toolbox – Allen keys, electrical and duct tape, a builder’s pencil, and utility knife. Screwdrivers, a hammer, sanding paper, pliers, scraper, chisel, pliers, wire cutters, etc.
- Power tools – Pressure washer, electric drill, air compressor, leafblower.
- Lawn care equipment – Lawn mower, edger, trimmer, shovels, rakes, and more.
- Seasonal items – Patio furniture, BBQ, portable fire pit, holiday decorations (e.g. Christmas). Outdoor sports and entertainment equipment, such as bikes, bats, and balls.
12. Get organised
Speaking of storing your items, let’s get them organised!
An organised garden building is the dream of every shed owner. But it’s one that’s rarely reaslised.
The benefits of a tidy shed aren’t just limited to extra room for storage. You’ll also be able to find your items quickly, and it spruces up the look of your outdoor space. Here are some practical ways to organise your garden building.
- Cabinets and shelves. Install cabinets and shelves for you to store your gardening tools and other equipment in one place. This will maximise space and allow you to access tools more easily.
- Pegboards. Installing a pegboard organiser lets you have an assortment of tools available on your wall.
- Racks on the walls. Racks can hold your shovels, spades, rakes, and other gardening essentials. With racks, you can arrange tools in a more space-efficient manner.
- Magnetic strips. This is a clever way to keep your small metal tools in one place. They are also ideal for those who don’t want to have a huge toolbox lying around.
- Containers for chemicals. Placing all your pesticide spray, weed killer, paint, and treatments in a storage container will keep them safe from outside exposure. Opt for heavy-duty plastic bins/containers.
- Garden hose hanger. A garden hose can take up a huge amount of space in your shed. But investing in a hose hanger will act as a reminder for you to roll up your hose instead of leaving it all over the place after using it.
- Utility hooks. Installing sturdy hooks on the walls means you can hang sporting equipment or cords rather than cluttering up the workbenches, floor, or corners of your shed.
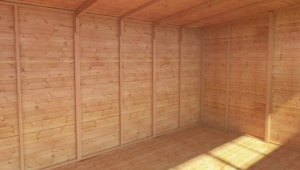
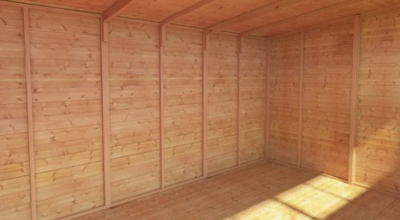
13. Make improvements to the walls, floor, and roof
If you want to get a good gauge on the condition of your shed, keep an eye out for the floors, walls, and roof. To do this effectively, empty out your outdoor structure.
To ensure your floor is debris-free, sweeping it will do the trick. Do the job thoroughly and don’t let any rubbish or trash linger. Otherwise, this can attract bugs, rodents, and other pests.
As for the wall surface, look out for any cracks or holes lurking around. You can start by doing an interior and exterior inspection to identify the gaps. Then seal them before they can invite cold air and rodents to enter your shed.
Fill any holes you find with caulking or spray foam.
As for the roof – check out the next point on our list!
14. Shed roof maintenance
If you have a metal shed, then other than examining the condition of your roof (point #5) and clearing the gutters (point #6), you’ll need to look out for rust. If you spot any, use a wire brush, primer, and repaint to restore its condition.
Next is to ensure that there are no loose pieces on your roof. Whether your roof is metal or felt shingle, be sure all its components are fastened down correctly.
If you spot loose shingles, make sure to replace patches. As for metal roofs, be sure all the metal is affixed properly.
Lastly, regardless of the season, check your roof after any major weather events!
Let’s say there’s been a big snowstorm or windy weather, you’d better check your roof.
Identifying the issue and solving the problem right away can help you save your roof and the shed itself. Other things to look out for when inspecting are:
- Bent or dented parts
- Cracked caulking and sealant
- Missing, torn, curled, or warped shingles
15. Keep your roof debris-free
Piles of leaves, branches, and falling debris can damage your roof if they’re left sitting for too long. To prevent any dent from occurring, here’s what you can do.
Trim overhanging branches to reduce the friction between your shed roof and tree. If there are any branches leaning or hanging over your roof, get rid of them as soon as possible. They can cause damage it can cause if left untrimmed and they fall. Or, they can wear down your roof with run off and any falling fruits.
Another thing you’ll need to remove is any moss and algae. A certain part of your roof will likely receive less sunlight. That bit will be inclined to moisture, moss, and algae growth. These can all weaken your roof if they’re left untreated.
To deal with this, you can install zinc control strips on the pent or under shingles on your roof to prevent moss growth. If you have a really large shed, make sure to do this along the hips as well.
16.Deep clean the exterior
Maintaining the exterior of your shed is just as important as upkeeping its interior. Regardless of the siding of your outdoor building, be it wood, metal, or plastic, it’s important to keep it clean!
Cleaning the exterior on a regular basis may sound like a daunting task, but this guarantees your shed to be stain- and mildew-free. By doing so, you’ll keep your shed in good shape for years to come.
What’s more, it also makes it look nice! So whether you want to feel proud of your shed again or use it to add extra value to your property – make it look clean. The outcome can be beneficial both for you and your outdoor building.
You can use a mixture of dish soap and water to scrub off dirt and grime. Or you can use a power washer, if you have one, to speed up the cleaning process.
Other liquid cleaning solutions for washing the exterior of your shed include:
- White vinegar (30% white vinegar/70% water)
- Laundry detergent (⅓ cup of laundry detergent/6 gallons of water)
- Bicarbonate of soda (1 ½ cups to ½ cup of soap, with a splash of essential oil for fragrance)
17. Repaint siding
If you own a plastic or metal shed, keeping the exterior clean through washing might suffice. However, it’s different for wooden sheds. You’ll likely need to repaint them every few years, depending on the brand or type of paint you use.
If you think your shed needs retouching this year, choose a paint or protector that is mildew and fade resistant, durable, and covers easily. You can ask for a professional’s help or you can do this yourself. If it’s the latter, there are a few things you need to keep in mind:
- Start with an oil-based primer to seal the holes (if there are any) and prevent pests from feeding on the wood.
- Choose your method of painting: it could be the usual brush painting or gun painting. Pick whichever works best for your shed size.
- Apply the paint in multiple, thinner coats. This is to avoid runs and drips.
18. Consider treatments
Apart from painting, you also may consider applying treatments, mainly for wooden sheds. You can disregard this step if your shed’s timber has already been pressure-treated for low maintenance.
Pressure-treating works by sealing timber in a vacuum in large tanks. Chemical preservatives are then pumped in to penetrate the wood. Finally, it’s removed and left to dry.
As such, a pressure-treated building can stand up to even harsh weather conditions. At the same time, it has an extended lifespan compared to untreated sheds.
But if it hasn’t been treated, applying wood preservative is crucial. Wood preservatives such as a water-based stain can be your best bet.
This type of preservative and other waterproof shed paints are quick to dry and keep excess moisture out. Water-based stains also contain fewer volatile organic compounds, making them a less toxic preservative alternative!
If you wish to do it yourself, be sure there’s plenty of space for you to move around. Having enough room invites more airflow, keeping your garden building nice and dry.
19. Apply shed treatment yourself
Shed treatment is crucial for prolonging the lifespan of your building. Do this at least once a year by treating the exterior with good quality wood preservative or timber treatment products.
In doing so, it will protect your shed from all kinds of weather damage. Exterior wood oils and decking oils also offer extra protection if used over the top of a wood preservative.
Here’s a quick guide on how to apply wood treatment yourself:
- Prepare your shed with sandpaper. This step is important, especially if the building is old and needs a touch-up. Also, chip away at loose or patchy paint that may have been left behind from previous paint jobs.
- Apply the wood primer. This will ensure better adhesion and durability of your paint.
- It’s time to paint! Once the primer is dry, apply the first coat of paint, then the second and the final coat. Make sure the paint is distributed evenly.
Top Tip: Wait for 24 to 48 hours before applying any oil-based products over wood preservative.
If you’re treating the inside of the shed, be sure to allow for good ventilation. Keep the shed’s windows and doors open during the treatment of the shed and drying.
You’ll also want to make sure there’s plenty of space for you to move around. Having enough room invites more airflow, keeping your garden building nice and dry.
20. Ensure the surrounding area is neat
Keep the surrounding of your shed as neat and tidy as you would do to your own home. This can help to keep potential pests away from your shed.
It’s also easy to miss the signs of pest infestation if you don’t spend most of your time in your shed. Making sure the structure’s surrounding is neat and well-trimmed will reduce the risks.
Trim away branches that might touch the roof and clear tall grass and vegetation away from the shed.
21. Upkeep for your plastic shed’s roof
Snow is one of the biggest enemies of plastic sheds. If you own one, you don’t want to let snow pile up on the roof. Otherwise, your shed could collapse under the heavy weight of it.
During the wintertime (if snow is present), check your shed’s roof and try to clear it regularly. Consider investing in some roof strengthening kits to add strength and durability, too. These contain extra steel rafters for your plastic shed’s roof.
22. Maintenance for your metal shed’s roof
Although metal sheds are known for their durability, their roofs are not impervious to damage. Both natural and human factors still can cause damage to metal structures, especially if no effort is made to maintain them.
Small rust patches can start to appear followed by small holes in the metal sheets. If overlooked, this can invite water and moisture to seep in. Don’t wait for the patches and holes to appear and grow before you take action.

23. Daily maintenance for your tools
Tools for gardening and repair are often exposed to dirt, grease, and other elements. This is what makes them susceptible to bacteria, fungi, or even insect infestations.
To prevent the microbes from spreading throughout the garden, regular maintenance is a must. A well-maintained tool also helps it to last longer.
So the next time you use any equipment, keep it clean after use. Here are some tips for daily tool care:
- Rinse digging tools with a garden hose. Scrub off the dirt using a wire brush or putty knife.
- Try to avoid petrol and oil spills when using garden tools – these can seep into your soil.
- Use disinfecting wipes to remove sap, bacteria, and fungus for a quick tool clean-up.
- Dry your tools thoroughly with a towel or rag.
- Store them in a dry, well-ventilated area. For smaller tools, keep them in storage containers. Larger tools should be hung upside down.
Your daily maintenance routine for your tools might also include:
24. Removing sap
Pruner blades that are clogged with sap can be difficult to use. When cleaning, we recommend using solvents like mineral spirits or turpentine.
Wipe the blades first with a cloth or cotton ball before dipping. Then, with the use of soapy water, clean the blades. You can even treat them with linseed oil before storing them to prevent rust.
25. Preventing and removing rust
Don’t store your tools wet! Dry and treat them with linseed or lubricant to keep tools from getting rusty.
If you happen to spot rust on your tools, here’s what you can do to get them back in working order:
- Soak them in a 1:1 mixture of vinegar and water overnight.
- Scrub the rusted parts using steel wool in a circular motion.
- Double rinse them. First with soapy water, then with clean water.
- Let them dry, then apply linseed or oil before storing.
26. Seasonal tool care
In addition to daily maintenance, if you own pruners, loppers and shears, they should be deep cleaned at least once every season. This can be done at the end of, say, summer before storing them for winter.
- First, unscrew nuts and bolts. Then wash these parts separately in soapy water.
- Soak tools in vinegar and water.
- Scrub with steel wool to remove rust. Rinse and dry.
- To sanitise them, soak in bleach and water. Rinse and dry.
- Apply linseed oil before reassembling.
Your seasonal maintenance routine for your tools might also include:
27. Keeping them sharp
Cutting or pruning with dull blades often results in damaged branches. Trimming plants or branches with blunt blades will only make plants prone to disease, let alone give you an uneven cut.
To keep pruners and other cutting tools sharp, use a specialised pruner-sharpening tool or stone. As for hoes and shovels use a sharpening file, followed by a sharpening stone for a quick touch up.
28. Taking care of the handles
Don’t forget to take care of the handles as well! For wooden handles, minor cracks can be fixed with heavy-duty tapes like hockey-stick tape.
For seriously cracked handles, they should be replaced immediately to save yourself from injury. Feel free to follow the tips below for some ideas on how you can maintain your handles.
- After each use, wipe the handle with a damp cloth.
- Check for any cracks or weakening at the join between the handle and the tool head. Address any issues right away.
- Seasonally, or as needed, lightly sand them and apply linseed oil to condition the handles.
29. Check your shed security status
How often do you check up on your shed? And did you know that burglars take advantage of the seasons like winter to steal shed contents? When the days are shorter and we stay indoors, our shed’s can become vulnerable.
Whatever your shed’s purpose is, think about the belongings you store inside. They likely hold monetary and sentimental value. Be it gardening equipment like a lawnmower, or outdoor party stuff such as a BBQ grill – keep it all safe.
Instead of relying on a rusty old lock, we advise utilising different methods to avoid theft. For ideas, take a moment to go through our checklist below.
30. Double check shed security
If you think about it, no matter how well-maintained your shed is, if it lacks security, it won’t really matter. So here are a few easy steps to better protect your shed and its belongings.
- Choose the location carefully. Where possible, your shed shouldn’t be entirely out of your sight, so you can deter thieves from trying to break into your shed.
- Replace the lock. Avoid using low-quality ones, instead, opt for a hasp with a strong padlock.
- Replace the door hinge. Instead of using screws, try nuts and bolts. Then, superglue the nut to the bolt on the inside of the door to toughen them up. This will deter criminals from trying to prise off your shed’s door.
- Anchor the shed. Anchor your shed to the ground with L brackets, or attach your shed to a garden wall. Or, place breeze blocks inside to make it too heavy to lift. This will also prevent your shed from blowing away on super windy days.
- Fit an alarm. This is a clever way to scare the thieves away. You can place a motion sensor in the corner of your shed, along with a door sensor and a siren.
- Obscure windows. Block them out with stick-on thick security sheets.
And there you go. Our shed maintenance checklist may seem a lot but you’re lucky you found it!
This ultimate guide can help you save time from searching all over the internet for tips. And most importantly, it will guarantee that your shed lasts longer and allow you to use it to the fullest.
But in some cases, a worn-out garden building is simply beyond maintenance and repair. So, if you’re in that boat and you’re looking for a replacement, check out our range of high-quality sheds and garden buildings.
Shop Garden Sheds


What do you think ?