
Jump to:
Installing a summerhouse is easier when you understand the basic steps involved. This guide breaks down the common steps that apply to all summerhouse types, without being model-specific. So if you haven’t bought your summerhouse yet, or you’re not sure what the process looks like when your building kit arrives, here’s what to expect.
Preparing to build a summerhouse
There are two preparation stages to get right before anything goes up: choosing the location and building a solid base. Get these right and the rest of the build goes far more smoothly.
Plan the location
Start by choosing flat, stable ground, away from trees, fences and other obstacles. Leave enough room around the footprint so you can manoeuvre the panels during installation, rather than working in a tight gap against a wall or boundary.
Think about which way it should face. This is a genuine choice, not a fixed rule, and it depends on how you’ll use the space:
- South-facing gets the most daylight and warmth through the day. It’s ideal if you want a bright, sunny retreat and plan to use the building most in spring and autumn, but it can get hot at the height of summer.
- East-facing catches the morning sun, then sits in shade through the afternoon, good if you want a cooler space for working or relaxing later in the day.
- West-facing stays cooler in the morning and warms up for evening sun, well suited to entertaining or unwinding after work.
- North-facing stays the most shaded and even-tempered, which some people prefer for a studio or office where direct glare on a screen is a nuisance.
If you want sun but worry about overheating, see our advice on keeping a summerhouse cool—shading and good ventilation make a big difference.
Decide on any extras before you start, such as electricity or lighting. Check where cables or sockets can run without obstructing panels or doors, so everything lines up once the building goes in.
Build the summerhouse base
A summerhouse needs a flat, level, solid base—this is the single most important part of the whole job, because the building’s stability and longevity depend on it. Once you’ve chosen the location, sweep it clear of debris, rocks and loose soil, and make sure the ground beneath is firm and compact.
Then lay your foundation. This can be concrete, paving slabs or a timber base—the choice is yours. For slabs or a timber base, tap each section down so nothing wobbles, and use a spirit level across several points to confirm it’s even. The base should be at least as large as the building’s footprint so no part of the structure overhangs.
If you’ve laid a concrete base, let it cure for at least 48 hours before stepping on it or starting the build.
Installing a summerhouse
Our summerhouse kits always come with digital instructions to make the process simple.
With the base ready, the installation is ready to begin. This article isn’t an instruction manual for a particular building, but these are the basic four steps that the process will consist of:
Fit the floor
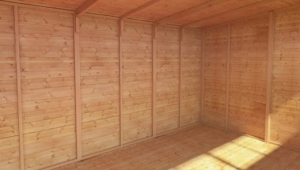
Lay the floor panels or boards onto the base, each one sitting flat, square and gap-free. The floor should rest on bearers so the boards never make direct contact with the ground—this keeps damp out from underneath. Fasten the boards once you’re happy with the position, and press down to check they stay put.
The walls rely on a strong, secure floor, so make sure everything is firm before moving on.
Put up the wall panels
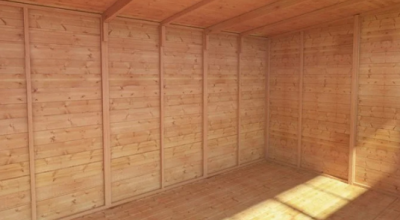
Line up the first panel with the edge of the floor and screw it down. Bring in the next and join it, keeping the corners flush. As you work round, use the fastening rail or brackets to hold each panel square so the walls don’t lean or twist.
Keep checking that the walls sit straight and the joins stay tight. Take your time here—gaps or uneven panels at this stage will throw the rest of the build off once the roof goes on.
Add the roof
Set the trusses or purlins across the top of the walls to support the frame, checking they sit straight, as everything above relies on them. Lift the roof boards up one at a time, setting each with its edges tight against the next, and nail into place. Once they’re fixed down, fit the fascia boards and gable ends.
To finish, roll out the roof felt, overlapping each strip, and nail it down. The overlaps make sure rain runs off the roof instead of seeping inside.
Treat the timber
Coat the summerhouse with a good exterior timber treatment or paint as soon as it’s built. This protects against the rain, damp and sun damage that cause rot and warping. Don’t miss the edges, corners and the lower panels near the ground, as these take the most wear.
Plan to refresh the treatment every couple of years, or sooner if the colour fades or the timber starts to look dry. If your summerhouse was ordered with pressure treatment, this protection is built deep into the wood from the start and extends our anti-rot guarantee from 10 to 15 years.
Easy-build summerhouse kits
A summerhouse kit is far less hassle than sourcing your own materials. Every part is cut to size, the panels line up as they should, and the fixings are packed in. There’s no measuring or cutting, and no hunting for parts that aren’t there.
Our range comes in a variety of sizes and designs, including log cabin summerhouses, corner summerhouses and contemporary summerhouses.
FAQ
Which way should my summerhouse face?
There’s no single right answer—it depends on how and when you’ll use it. A south-facing summerhouse gets the most light and warmth all day, ideal for a bright retreat used across the cooler months, though it can get hot in midsummer. East-facing gives you morning sun and afternoon shade; west-facing stays cooler early and catches the evening sun, which suits entertaining. North-facing stays the most shaded and even, which can be better for an office or studio where screen glare is an issue. If you want plenty of sun but are worried about summer heat, prioritise good ventilation and some shading rather than avoiding a sunny spot altogether.
Can you have a summerhouse without planning permission?
In most cases, yes—summerhouses usually fall under “permitted development,” which doesn’t require planning permission. The common conditions are that the building sits behind the front of your house, leaves at least 50% of your garden uncovered by buildings, and stays within the height limits (which are stricter within 2m of a boundary). Different or stricter rules can apply in conservation areas, on listed properties, or if you intend to sleep or live in the building. Because permitted development depends on your specific property, we’d always recommend checking with your local planning authority if you’re at all unsure.


What do you think ?