Jump to:
When BBQing, achieving the perfect cook requires precision and careful temperature control. That’s where a digital thermometer becomes your secret weapon.
In this guide, we will unlock the secrets of using a digital thermometer to elevate your BBQ game to new heights. Understanding how to use this essential tool can make all the difference. So, let’s fire up the grill and dive into the world of digital thermometer mastery!
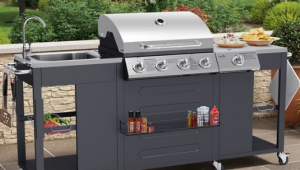
BBQ Digital Thermometers

(Image Credit: Wikimedia Commons)
BBQ digital thermometers are essential tools that help grillers achieve precise temperature control. They provide quick and accurate readings, ensuring perfectly cooked meat every time. This eliminates the guesswork and reduces the risk of undercooked or overcooked food.
These thermometers consist of the following:

- a handheld unit with a digital display
- one or more probes that are inserted into the meat to measure its internal temperature
The probes are connected either through a wired or wireless connection. This allows real-time temperature monitoring without the need to open the grill constantly.
Types of Digital Thermometers
(Image Credit: Wallpaper Flare)
There are several types of digital thermometers available for BBQ use. Here are three common types:
Instant-read thermometers
These thermometers provide quick temperature readings within a few seconds. They are typically handheld and have a probe inserted into the meat. Pros include their speed, portability, and versatility for various cooking methods. However, they are not designed for continuous monitoring, and their accuracy may vary.
Leave-in thermometers
These thermometers are inserted into the meat before cooking. And as the name suggests, they are left in throughout the cooking process. They often come with a base unit displaying the temperature outside the grill.
Pros include the ability to monitor the temperature without constantly opening the grill. However, they may have a limited range or require wired connections.
Wireless thermometers
This type of thermometer consists of a transmitter unit. It comes with probes that connect wirelessly to a receiver or smartphone app.
Pros include the freedom to monitor temperature remotely. Plus, increased range and multiple probes for monitoring different cuts of meat simultaneously. But they may be more expensive and require additional setup.
Preparing Your BBQ and Thermometer
Start by cleaning the grill grates thoroughly. Use a grill brush to remove any leftover food debris, grease, or residue. This ensures better heat distribution and prevents any unwanted flavours in your food.
Inspect the burners, igniter, and gas supply to ensure everything is in working order. Check for any blockages or leaks that might affect the grill’s performance or safety.
Preheat the grill to the desired temperature for your cooking method. This allows for even heat distribution. Plus, doing so helps prevent food from sticking to the grates.
Calibration ensures accurate temperature readings. Fill a glass with ice water and insert the probe, making sure it doesn’t touch the sides or bottom. The thermometer should read close to 32°F (0°C). If it doesn’t, follow the manufacturer’s instructions to adjust the calibration.
Depending on the type of digital thermometer, ensure the batteries are charged. Familiarise yourself with the buttons and settings for ease of use during cooking.
By following these steps, you can ensure food safety. You can also achieve accurate temperature readings and optimal cooking results!
Proper Probe Placement
Proper probe placement is crucial for obtaining accurate temperature readings. The location where the probe is inserted affects the accuracy of the reading.
For larger cuts of meat, it’s best to insert the probe into the thickest part of the meat, away from any bones. This ensures that the thermometer measures the internal temperature of the meat accurately.
When dealing with thinner cuts, insert the probe into the centre of the thickest part. Aim to position the probe away from excessive fat, as this can lead to inaccurate readings.
Interpreting Temperature Readings
Here are some recommended internal temperature ranges for common meats:
- Beef (steaks, roasts): Medium-rare: 135-145°F (57-63°C), Medium: 145-155°F (63-68°C), Well-done: 160°F (71°C) and above.
- Poultry (chicken, turkey): Chicken breast: 165°F (74°C), Thighs and legs: 170-175°F (77-79°C), Whole turkey: 165°F (74°C) in the thickest part.
- Pork: Medium: 145°F (63°C), Well-done: 160°F (71°C) and above.
- Fish: 145°F (63°C) or until opaque and flakes easily with a fork.
- Ground meats: 160°F (71°C) for beef, pork, and veal; 165°F (74°C) for poultry.
Determining the desired doneness is a matter of personal preference. Use a digital thermometer to check the internal temperature. You may also consult a doneness chart for specific meats.
Monitoring Temperature Progress
To monitor temperature progress effectively with a digital thermometer, follow these steps:
- Insert the probe into the thickest part of the meat, away from bones or excessive fat.
- Place the meat on the grill and close the lid.
- Keep the digital thermometer’s handheld unit or receiver nearby for easy access.
- Monitor the temperature in real-time as the meat cooks. Observe the readings on the display.
- Adjust cooking time or heat levels based on temperature trends to achieve the desired doneness.
Real-time monitoring with a digital thermometer offers several advantages. It allows for ensuring optimal results and avoiding overcooking or undercooking.
Round-up
Understanding the use of BBQ digital thermometers can level up your grilling game! So, fire up the grill and embrace the convenience and accuracy of a digital thermometer. Ready to impress your guests with mouthwatering BBQ creations next weekend?


What do you think ?